 AUTOMATE
I think this is the easiest and the most USEFUL tip I’ve ever learned. It saved me time, and definitely stopped me from getting arthritis.
What Does Automate do?
EVERYTHING except animate or color…or erase for you. (okay well not EVERYTHING, but it can do a lot) What I used automate for was, when I scanned my animation, they were all scanned in sideways, so I had to flip them ALL over to the correct way. With a click of a button, it did it all for me.
So here’s how to set it up.
This is an example for flipping AND saving an image.
HOW TO SET UP AUTOMATE
Go to the Actions toolbar (located on the left. OR you can go to Window in the menu and click Actions)
It looks like this
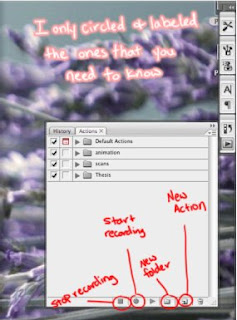
* IMPORTANT!!!!! You should have an image that is already saved on your computer opened in Photoshop so you can use it to set up the action when you first do this! This is crucial!
1. click on the folder button and label it “THESIS” (so you’ll know what folder you have to look for IN CASE you make other folders for other things.)
2. click on “create New Actions” and a new action window will pop up. Label the name Flip + Save and on SET: it should be in the Thesis folder that we made in step 1.
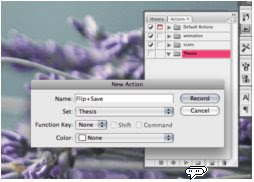
3. Click record, and everything you do from now on will be recorded. So be sure not to be opening and click on whatever the hell you want to. Because it’ll automatically do everything you do when you decide use automate.
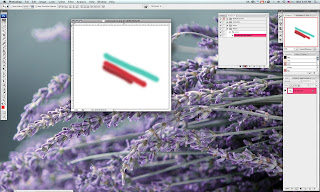
4. So here is my “setup image” (isn’t it beautiful?)
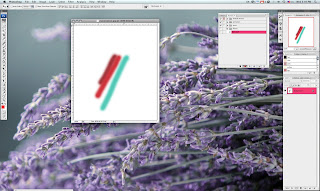
a. Okay while its recording go to IMAGE > Rotate Canvas and depending which way you scanned your files, flip it to the correct direction. Mine was scanned over to the right, so I rotated the canvas 90 degree CCW (counter clockwise). You’re image should flip over and it should be recorded.
This is what it should look like afterwards:
5. Now save your file (not SAVE AS, automate isn’t smart enough to label your images, so what I did was just save over the original image by just saving it
a. Your image will be saved and reco
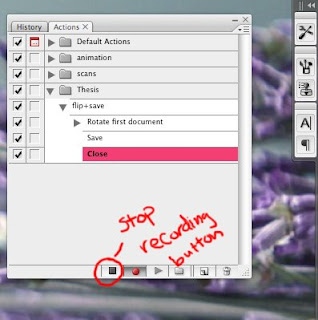
6. now close the image and that should als
a. This is important! > now you need
Done! You’ve successfully finished setting up and creating an action!
HOW TO USE WHAT YOU’VE SET UP!
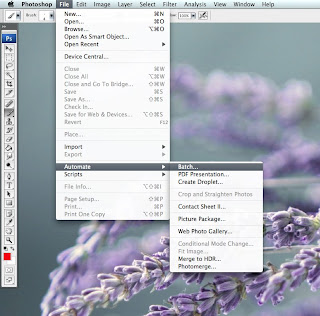
1. Go to File > Automate > Batch
2. It will open a window labeled Batch.
a. Now click on set > Thesis (like how you labeled it when we were setting up)
b. Then click on Actions > flip + Save
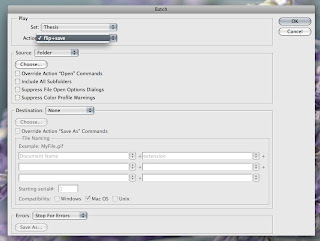
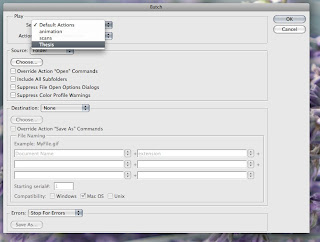 3.There’s a button that says “Choose”. Click it and choose the folder that the scanned images are in.
a. You can also click “include all subfolders” if there are folders inside the folders and you want those to have.
4. Click “OK”. Watch and have a religious experience.
It’ll flip and save ALL the images you scanned in and while it’s doing this, you can sit back, eat a cookie, watch some Youtube, take a shower (if you end up having a lot of files).
This was especially helpful when you have tons of files/layers.this JUST to flip images. You even add the action of shrinking down an image.
Repeat steps 1 -3 and on step 4, you can either add another action there or even start a completely new action. It’s really up to you.
If you’re unsure if you did the set up correctly, you can always do a test run.
Helpful Hints on COLORING
Ever started coloring an image with multiple colors, and started to worry that you’re going to color over another color? Ever hated making new layers for each color?(it makes the file 10 times bigger when you have a lot of layers)
I’ll show you an easy way to color using only 1 separate layer. Yes I said it, only ONE separate layer. This is not black magic or tricks and illusions.
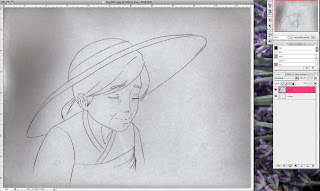
1. I opened up an image. And I unlocked the image (by double clicking it) and putting it on the layer setting of Multiply.
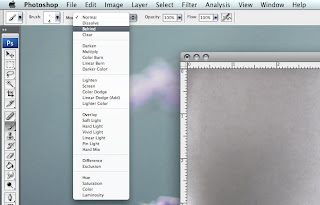
2. While on the brush tool, you’ll see on the top-left corner under the photoshop menu bar, this toolbar:
 Where it says mode: it on “Normal” by default.
3. Click on the menu where it says “normal” and a drop menu will pull down. There’s an option that says “Behind”. Click on it.
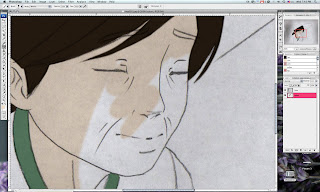
4. Begin coloring your first color on the image. When you move on to the next color, you’ll notice that it won’t go over the previous color because it’s coloring “BEHIND” that.
Tips and Hints using the Behind Brush tool
- I would color some areas and leave the bigger areas for the behind tool.
- (I.E) in the image above, I colored the hair and the green collar, and then I would use the behind tool to color the skin the shirt and the hat, so I can just color over without worrying about not coloring the green collar, or the skin.
- Think of it like coloring it cell style.
What you sacrifice doing this:
You sacrifice nothing except for the fact that you should make certain parts neater the first time around. You can always erase, but then it’ll erase what you’ve colored on that layer.
Play around with it. It’s pretty easy to use and get around with. Instead of erasing you can always go back to normal brush and brush things over.
How to use the CLONE TOOL
The clone tool looks weird, and it can be confusing to use at first, but once you get the hang of it, it can be a useful tool to use when you’re cleaning up your animation.
1. open up an image you want to clean up (like dust, scratches, and even messy drawings)
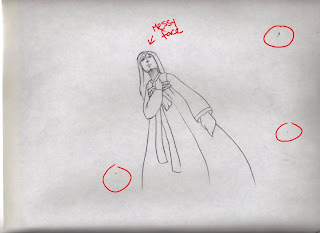
I marked all the areas that need to be cleaned using the clone tool.
2. using the clone stamp tool, press and hold ALT (for mac/pc) you’ll notice that you’ll get what looks like a bulls eye. Now select an area NEAR (this is important) the area that needs to be cleaned. (I can’t screen capture the mouse, but this is what it looks like)
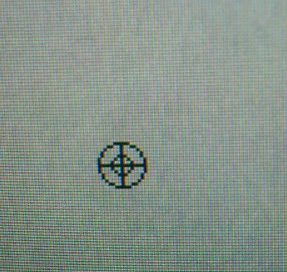
what this did was it captured the texture and area of where you clicked. You can let go of the ALT button and begin cleaning the area. You’ll see a cross hair scanning the area you clicked on when you begin cleaning up. That crosshair is important because that’s what it’s essentially copying over the mess.
I’ll show you a more complicated example.

I drew in crosshairs to mark the face and forgot to erase it. The way I cleaned up the face was by click in the area where the cheek is located used that base to cover up the cross hairs. But then you’ll come across this problem…
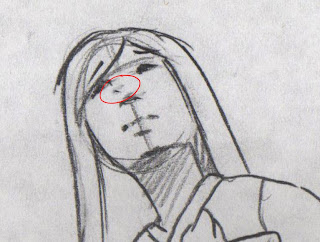
What happened was that it started to copy the area of the nose and this is because, as you’re cleaning you’ll notice a crosshair that moves around as you’re using the tool. The crosshair is there to indicate what area you’re copying. So as it moved, the cross hair copied the nose and is putting the image of the nose that it’s copying onto the area I’m cleaning. This is bad! What do you do?
Easy.
As you’re cleaning, go back and make another copy (by pressing and holding ALT) to the clean area again. This will reset the clone to copy the area again as you’re moving to different areas of cleaning.
This is the before and after picture of the clean up process.
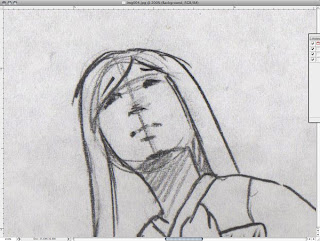
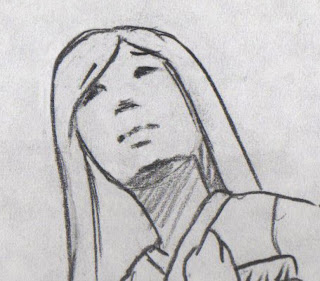
Before After
The reason why I say that you should copy the AREA you’re cleaning is because when you copy from a different area changes the colors slightly and you’ll notice where you’ve used that damn clone tool. This will make you look like a lazy ass and plus its messier looking.
I’ll show you what I mean…
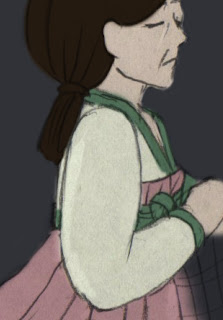
look at the left side of that arm. And the face. Doesn’t that make you cringe? This person might not have noticed it when they cleaned up, but it definitely showed through when they colored.
This looks BAD. You might think “oh it’s just one frame, it’ll just pass and no one will notice.”
WRONG. You WILL notice and the AUDIENCE will notice. They’ll cringe and knowing SVA, we’re picky, and we like to point out all the flaws. TRUST ME. People will notice. Don’t be that person who made the film where everyone says “oh yea his/her film! Nice animation, but BAD CLEANUP.” It can ruin your film.
Things to think about when making your film
Okay. So I’m not going to be the one to tell you to do this or do that to your film. ITS YOUR FILM! Have fun with it! When will you ever have the time to make another and have it shown in a full theater? (not saying you won’t)
All I really have to say is, don’t make your thesis film based on these facts.
1. it’s easy. I’ll get it done faster.
2. Well, I like fighting montages.
3. Omggggg I w4nt t0 m4k3 z3 f1lmz ab0u7 mai interweb r0l3pl4ying frenzzzzzz (I think my spell check just freaked out on me)
4. Inside jokes.
Challenge yourself. Make something or make it by using something you don’t think you’ll be able to do again. It might take longer, but the end result will be more gratifying.
No comments:
Post a Comment